How would you rate the overall quality of the product?
Very Low
Okay
Very Good
How would you rate the value of the product for the money?
Very Low
Okay
Very Good
How difficult or easy is the product to assemble, use, or operate?
Very Difficult
Average
Very Easy
How well does the product perform / function?
Very Weak
Okay
Very Good
“This is not my first F/A-18C Hornet fuselage. I could have sworn my previous one had the small connecting rods and springs already installed as part of the fuselage. Fortunately I still have the original springs and control rods. It would be a shame and a rude awakening if you did not when you started putting yours together. And they are not sold separately. You must buy the other parts they connect to, even though that part is installed in the replacement fuselage. When you get yours, the elevator and especially the rudder servo wire ends may not be apparent. They will most likely be covered in spray paint and appear to be part of the fuselage. Look around the rudder servo wire opening and it is stuffed into a pocket that is completely painted over. Other than those 2 items, the rest is an easy assembly. I prefer to cover the cheater vent under the fuselage with aluminum screen. I fly off grass exclusively so if the vent is left as is, the fan quickly becomes clogged with debris.The battery tray is included but IMHO too short. I bought Dustin's longer battery tray and bolted it to the underside of the nose gear mount.If you are having steering problems on the runway, look at the nose gear retract assembly and see if it is totally solid. If it is not, I recommend a piece of triangle stock inside the nose retract mount to firm it up against the sidewall of the nose section. I also added some wood under the tray to lift it 1/8th inch so that the 2 LED wires won't get pinched. I also cut the area aft of the cockpit/battery tray cover back so that you can get to the area all the way back to where the wire tunnel is closed up. This makes accessing your Rx and the Blue Box much easier. With these mods, the jet is much more stable on takeoff, and easier to get to things.”
“The first thing I do to my fuselage is cut the top section of the fuselage to extend the battery hatch cover back 140mm. Access with the standard hatch is very limited. Cutting off the extra 140mm aft to the first foam bulkhead allows access all the way for maximum access. I use Gorilla Glue to attach it to the stock hatch. This is how the fuselage and battery hatch should have been designed from the start. Having the elevator and rudder Ys installed is a must and FW has done that for you. Otherwise it would be nearly impossible to route them in. There are no decals applied so be sure to order them if you plan to use the stock Blue Angels livery. I only gave the easy to assemble and use 2 stars considering the mod required to install electronics, i.e. extending the hatch.”
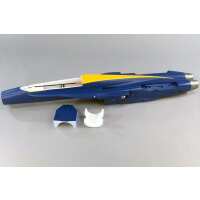
“Fuse was is great shape. Photo is a bit misleading as decals are not pre-applied.Make sure and purchase the decal sheet and use warm soapy water to apply them.The really cool thing is that that all lights with wiring is installed and ready saving a good bit of time.”