“Went on Youtube and found two relevant videos on the topic from: "Check It Out !!!" and "Stephanie Vandaelle"Cartridge is about 20 years old in a building that has a lot of mineral in the water. So lots of build up and really appreciate how long it's lasted.Shower handle fell off because the rod or stem was pretty much rotted away. Unfortunately rotating it with the plastic removal tool only helps to loosen it a bit but not by much. Couldn't use Cartridge Removal Tool, the metal one, because the stem or rod fell off and you need to screw on to that to be able to pull it out.Tools:Adjustable WrenchDrill and Drill BitAny long wood screwPry barWood plank or Long Metal Rod to Brace against TileCutter to mark and make drilling easyManual Screw DriverHeatgun or Hair DryerActual work time: 12 minsLooking for my disorganized tools: 45 minsDisassembled shower handle until I could access the shower cartridge and manifold. Turned OFF water via manifold (usually counter clockwise until it stops). Apartment building here so if your water shutoff might be in a different location.Drilled bottom of cartridge, the plastic part. Easier if you mark where you'll drill with a cutter so the drill bit finds purchase otherwise it'll slip around. Make sure it's straight as possible to not damage the pipes. Make a judgment call on whatever size you want based on the wood screw you plan on using. Makes sure it's not too big. I used a random wood screw that long enough to pry off of.Used a cheap $10 heat gun on the pipes until it was warm. Used plastic tool to rotate slightly ( not completely since the top of the cartridge hits the pipes and can only be rotated 180 degrees once it's actually out) and loosen cartridge clockwise. This absolutely helped to loosen the cartridge almost right away. No struggling at all. Things would have been worse without it.Used a manual screwdriver so I could better control the force on the woodscrew. Damaged pipes are more expensive work so be patient and careful.Then used prybar on the woodscrew. Metal rod or wood plank to brace on tile ( and protect tile) and leverage prybar off that. Do it SLOWLY and CONTROLLED and do not yank agressively. Be careful not to go ham as to not damage the metal pipe. Used heat gun again when encountered resistance in pipes. Once head of cartridge is stuck and no longer embedded in the pipe and have room to turn, I switched to the Moen Plastic Removal Tool and an adjustable wrench. Didn't need to yank it out after that just did a back and forth motion mostly going clockwise.Voila! Cartridge came out easy. I am thankful to the Youtube videos for such a great idea and my humble and mighty heat gun for helping a STUCK cartridge with a BROKEN STEM so easily done in less than 15 mins.By the way, the shower handle position will be in the middle position. So you might want to move it clockwise until it closes so you don't get a burst of water from the tub faucet once you turn the water back on. I completely forgot about this and found out the hard way.Talked to a retired handyman and he said once you encounter a good deal of resistance in the shower handle, should be a good time to replace the cartridge. I think I will take his advice from here on and save myself so much trouble.”
“Bought this to replace a 20 yr old cartridge. Removing the old one was difficult even with a puller as it only goes so far before it bottoms out.Once that happened, I just grabbed the handle and pulled hard while wiggling the cartridge side to side. Don't turn it too much or you risk breaking the cartridge inside the valve and that's not fun. Luckily mine came out in one piece minus the two rubber tabs on the side of the cartridge. They both tore and one piece was still inside the valve body. I'm quite certain those rubber parts are the source of the difficult removal.Installation was a tad difficult too. It appears the 1222 cartridge today is ever so slightly longer which meant I had to persuade the retaining clip to go back in fully. I used pliers to push the bottom of the clip until it fell into the slot. I read others had to either bevel the edge of new cartridge or shave down the clip which I'm glad I didn't have to do.Otherwise the new cartridge works well! It doesn't leak and it solved my low flow issue. I did notice the handle now turns very easily. Almost too easily. Maybe I used too much grease? I don't see a way to adjust the handle tension. Not really a huge concern I'm sure it will get better over time as the lubricant washes off and things gunk up.”
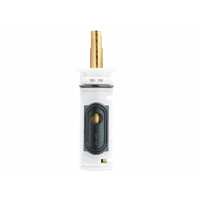
“Get this actual Moen item. I tried a generic version from HD. It was a disaster. Hard to get installed because it was a tiny, tiny bit too large. Didn't work. Pieces broke off getting it back out.”
“This MOEN replacement cartridge fit perfectly and works well. I watched a couple of videos on YouTube on how to remove and replace the cartridge. I couldn't have removed the old cartridge without the Cartridge Removal Tool I also bought on plumbingsupplyandmore. I highly recommend you but the removal tool also.”