“Ordered this product to replace a leaky one. Read a bunch of reviews and decided to go with the Moen brand instead of a knock-off one. Also read some of the horror stories about needing the extraction tool to get the old cartridge out. I personally experienced no issues. I took a chance on ordering this (and the tool) before removing the old cartridge, but it was the correct replacement I needed. There's another model very close to this one. As usual, it came on time, and was neatly packaged in a clam-shell. I took apart the faucet hardware, removed the retaining clip, used the extraction tool (incorrectly, but it worked) and the old cartridge came out no problem. Lubed up the seals with the supplied lubricant and it slid right into place with no issue. Reassembled the faucet and now it's not leaking and works perfectly.”
“The Moen 1222 One-Handle Posi-Temp Faucet Cartridge Replacement is a lifesaver for anyone seeking a hassle-free solution to restore the functionality of their Moen tub shower or shower-only configurations. As someone who recently replaced their old cartridge with the Moen 1222, I can confidently say that this replacement is a game-changer.Installing the cartridge was a breeze, even for someone like me with limited plumbing experience. There are plenty of YouTube videos available demonstrating how to install it. The cartridge's construction, made from a combination of brass and plastic, feels solid and well-crafted, giving me confidence that this replacement will be durable in the long run.The Posi-Temp technology is a standout feature of this cartridge. It ensures consistent water temperature, preventing sudden fluctuations that can be uncomfortable during showers. I've experienced firsthand how smoothly the temperature remains while using the faucet ‚Äì no more unexpected blasts of cold or scalding water.Functionality-wise, the cartridge has exceeded my expectations. The handle operates smoothly, and I've noticed a significant improvement in water flow and pressure. The cartridge replacement has essentially rejuvenated my shower experience, and I'm impressed by the consistent performance it delivers.Moen's reputation for quality shines through in this product. The cartridge is built to withstand regular use and offers a noticeable upgrade in terms of durability compared to the stock cartridge that came with my faucet. This means fewer replacements and more peace of mind.Overall, the Moen 1222 One-Handle Posi-Temp Faucet Cartridge Replacement is a brilliant solution for anyone facing faucet issues in their Moen tub shower or shower-only setup. Its ease of installation, compatibility, and reliable performance make it an exceptional investment for anyone seeking to improve their daily shower routine. With this cartridge, Moen has once again demonstrated its commitment to delivering top-tier plumbing solutions. Highly recommended for a seamless upgrade that will leave you satisfied for years to come!”
“My shower handle stuck one day, after removing all the trim I couldn't turn the stem it was seized up. I ordered this replacement part plus a stem puller plus valve grease. Took 45 min to pull out old one, new one took 30 seconds to put in. It's been a couple of weeks and still turns super easy and no drips.”
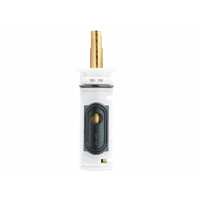
“Part 1222 and 1222B are identical. The "B' merely identifies bulk packaging purchased by contractors. If you have an old, Moen Posi-Temp, chances are the part number is 96909. My cartridge is 22 years old. It finally started to leak, The 1222 looks slightly different than the 96909. The 96909 has an O ring at the base - the 1222 does not. This causes me concern, but, after doing some research, I believe the 1222 is the only replacement for the 96909. Man people report that the 1222 bottoms out and will not seat properly. Sometimes, this could be from some debris. I had no debris, but it wasn't seating properly. All I can say is, turn it ever so slightly from the H/C tab and try again to seat the cartridge. Literally, a few microns to the right and mine slid in easily. Do not push it in from the stem as it can cause the valve to pop out of the bottom and stop the cartridge from seating. Now, I just have to hope that "missing" O ring isn't a problem. FYI, plumbingsupplyandmore had it $20.00 cheaper than Lowe's.”
“Once you figure out that all Moen twist-to-on use the 1222 and it is the same as the 1222b, you are set. Except that the instructions are a set of pictograms that say nothing. Studying them hard, you may figure out a few things, but not enough, so you call the help line and find it will be a 2 hour wait time, which turns into 3 hours. You'd think if you had that many people asking how to do it, you'd re-write the instructions. Years ago my job was editing and re-writing equipment manuals and maintenance procedures so that they were usable. There are some pretty good videos on line, but don't cover it all.First you would realize that when the handle is getting hard to turn (deposits in the interior), it will start to loosen the seal between the cartridge and the valve body, so it will start leaking.When taking it apart, you need to take out all screws, take off the face plate and collar to get at the clip that holds the cartridge in. This will be behind the wall. You will need needle nose pliers. Do not drop it behind the wall, since they don't include a new one.Note how the old cartridge is installed. That, in most installations, will be with the HC on top and the little notch will be in the bottom big notch. that is how you install the new one (some installations will require this upside down).Ones the clip is out, do not try to pull the cartridge, or you may break it inside. You must twist it with the plastic piece that comes with the new cartridge. With enough mineral deposits in the body, that may take a lot more pressure than you think. That twist will loosen the cartridge in the body and begin to pull it out. Once loose, you can pull.NOW, reach in with your fingers and check to make sure the body cavity is smooth and free of mineral deposits. It it has any, the new cartridge will not seal. Grab a green scotch-bite pad and reach in to clean off all deposits, then wipe or rinse (hard, since you have to go turn on the main water and rinse water will probably go behind the wall). Finally, lube the inside of the valve body and the exterior of the rubber pieces on the cartridge, then insert the way your original one was and insert the wire clip without dropping it.Reassemble and test. Good luck.”
“The cartridge was fine. Getting the old one out was a real dog even with a puller tool.Make sure to put silicone lubricant on the rubber components of the new cartridge like the o ring.I wouldn't buy from Idaho Trading Post again. Their description and photo did not match what I received.”