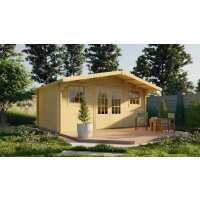
“I only bought the Karen log cabin after I had given up on buying a cabin from a different supplier. The cabin was delivered on the day and time that was agreed; everything complete in a big pallet. We had done a concrete base two weeks before which gave us the perfect foundations to build the cabin. We made it bigger than the cabin footprint as the start of a seating area around the cabin. The build itself went very smoothly and quickly with three of us working on it. The roof took a bit longer as I had to do that by myself. I love the instruction videos and the blog with good insulation tips for roof and floor. Tip: invest in a good and large tarpaulin to pull over the build while it is not yet closed. Not only will it keep the rain out but also stop the birds from messing. As I'm writing this, the build is nearly finished. The cabin is painted but still needs the drains put up. Then there are electrics to do and decorating the interior. Getting there though. I thoroughly recommend this product. If there is anything to comment on, it would be that I would have preferred the windows to have hinges at the sides instead of the top. I might change that by getting some different hinges. Apart from that I think it is a quality product and an experience to put together.”
“Dear Tuin UK Team Our garden is on quite a slope so we contacted Tuin enquiring how best to do the base. Tuin were very helpful and we followed your advice and had a wooden base built on short stilts which are set in concrete. Fortunately, the given measurements of 5 x 3.2 metres were very accurate so the building fitted perfectly on the base. The delivery arrived exactly when Tuin said it would and we were very impressed by how well the driver manoeuvred "Karen" onto the driveway! Actually erecting the building was relatively straightforward and apart from the shingles on the roof was completed in just one day. There are just a couple of points we would like to mention: 1) The Karen on your website shows the window hinges at the top, however, provided with the instructions was a photograph of a window showing the hinges on the side. We were therefore unsure which way up to put the windows. We sent an email to Tuin during construction. We received a very prompt reply and were advised to follow the photograph supplied, ie hinges on the side. We did this, but had to take the hinges off on one side and move them to a slightly different position as we wanted to open both windows out from the centre of the Karen. 2) It wasn't clear which way round the door frame base should go. It was a 50/50 chance but unfortunately we made the wrong decision! This meant the hole in the metal floor plate for the door bolt was in the wrong position, we would recommend sending it undrilled instead or put an arrow to show which way round it should be fitted. We are going to drill another hole in the right place and cover up the unwanted hole with a transition strip after we have laid the floor. The weather was against us towards the end of the construction - we were putting the shingles on in torrential rain and wind! Luckily we had put an EPDM rubber roof on before the weather turned against us so the Karen was already water tight and we fitted the shingles over the top of the EPDM. It took several days for a dry period to treat the outside. We have now put 2 coats of preserver on and will put a third on in the new year. The next task is to put the window bars on and then lay the laminate floor. We are currently getting quotes for a patio around the summerhouse. Due to the slope of the garden, this is going to take a bit more work. Once complete, we're looking forward to inviting friends and family around for drinks (COVID restrictions permitting of course!). We shall also use it for relaxing and reading. Where we have positioned it is a real suntrap so we're really looking forward to enjoying it next summer. We may even put a sofa bed in there! We have used brown preservative on the outside and have green rectangle shingles on the roof. We are delighted with the overall look and are glad we chose a summerhouse with a canopy at the front as we can have the doors and windows open without the rain coming in. Please see the attached photographs of the base, various stages of construction and the (almost) finished product! Once we have laid the laminate flooring, we will be happy to do a video walkaround. We hope this helps. Thank you Tuin - we will definitely recommend you! Kind regards S Davies”
“What a fantastic log cabin! I did a lot of research before optining for the Tuin Karen cabin. Other manufacturers were cheaper, but there were many points about Tuin that I liked. The assistance documents were very clear. The delivery was faultless and guidance for the base was perfect. The build was simple and a credit to the quality of manufacture. Every joint was within 1mm and the overall dimension on a 5 x 3 building were within about 3 mm. I was so impressed I bought the additional lean-too. A definant recommendation.”
“I bought my Karen cabin during the lockdown period. Great communication even though they were short staffed. Email updates regularly and particularly impressed with the Dutch driver contact details given to me a few days of delivery. Delivery was prompt. Very impressed with my Cabin. It gave us lots to do during lockdown and as a family we love it. Thank you Tuin.”
“Could not recommend the cabin and service received from Tuin more highly.... Cabin is fantastic quality and was put up in just a day.... I made an amendment a week after ordering the cabin and the customer services department could not have been more helpful....”
“We bought a Karen Log Cabin from Tuin. We decided on Tuin over other suppliers because I liked the Idea of being able to do what we want with the floor and liked the Blog format that gives you Ideas and tips on how to do things. The purchase experience was good and the delivery guy with the stacker truck managed to negotiate our tight drive entrance an put the palate exactly where we wanted it. We inspected the cabin and found that some off the pieces has marker pen on them and one of the windows was very roughly made. We got in touch with the support team and send them photos, they sent us new pieces and told us to carry on the build using the shoddy window and they would send us a replacement that we could swap when it arrived. In fact when the replacement came it was worse that the original however the support people pulled out all the stops and we now have a 3rd acceptable window in our possession We decided to treat all the pieces before we erected the cabin with Osmo Base coat which took about 4 days. On reflection we should have started erecting the cabin and treated each piece as we put it in position as during the treatment time some of the pieces had started to warp, which we put right using the techniques described in the blog and a few i developed myself. All went well until we came to putting the door frame together, the design of the door had been changed and the threshold was not as deep as we had been told during pre sales and our floor would be higher than the door threshold which would look terrible. I contacted the Support and they said the design had been changed and they had not had their information updated, they suggested packing under the door frame to lift it up. I pointed out we would then have to cut a notch in the log above it the depth of the packer otherwise we would loose the expansion gap. We did this and it looks OK. The rest of the build went well. We decided to insulate the floor and roof. We had a suspended timber frame floor so we cut 50mm insulation sheets to go between the joists. With the agreement of our electrician on the roof we ran the cables for the lights we wanted in the cabin to where we wanted them and laid 30mm Insulation sheets on top of them. The batons supplied to fix the barge boards were 30mm and we worked out we could put them on top of the roof to stop the insulation sliding down and the barge board still be below the T&G roof boards. We think it looks good. Just a note I cut the apex of the roof insulation at an angle so I did not have a gap at the top of the ridge Finally we fitted the roof shingles which took 2 days. We then went on holiday for 3 weeks. We were going to treat the cabin with Saladin Oak treatment but when we came back from our holiday the colour of the cabin had gone from the white to a more mellow colour that we really liked so we swapped the the salodin for some Osmo Clear UV protection and used that to treat the cabin. The cabin has now been complete for 6 months and I would post some pictured but cant see a way of doing that. We are pleased with cabin it adds to the look of the garden and gives us valuable space but we did have problems with the window and Door which might have phased someone who was not handy as us.”
“Our 'Karen 'is almost finished. It's taken longer than expected, because of the rain and bad weather since we had delivery in October. We have treated the outside with preservative and will continue to coat until we make a decision on the final finished colour. What we have not done is decide on the inside finish. We would really like a pale grey wash, which would show the wood through it. Is this a good idea and have you any suggestions of what to use. The finished room will be a teenage pad and 3 teenagers are desperate to make use of it real soon. There will be no reason to hang around 'street corners' or be where they should not be! Many thanks Tuin.”