“I agree with other reviewers that if you want an outstanding radio, there are probably better choices. But if you want practice in kit building, the satisfaction of a nice working radio and an exceptional education along the way, then there is nothing that beats this kit. It is especially outstanding if you have the test equipment (generator, oscilloscope) and then this kit is a terrific way to become adept at using those instruments. The manual is exceptionally well written. I took my time and savored each step especially the alignments and tests along the way.”
“Haven't assembled it yet, but the PCB is FR1 (some sort of paper or cotton laminate) instead of FR4 (fibreglass laminate) commonly used nowadays. I have bought an Elenco SMD kit before and it is of the same material, which bulges when you apply too high of a heat or for too long. I'm guessing this will do the same. Also the PCB looks like it's hand drawn without any PCB CAD software, with large as hell pads, no thermal relief around solder pads/rings, and traces bending in all directions. I bet it's going to be really hard to solder onto. It's already year 8102 why can't Elenco refresh their products with a more modern production method instead of using production methods probably from the 1950s or so? Sigh.”
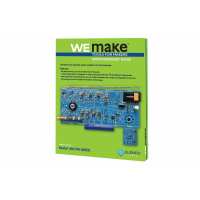
“This kit was a lot of fun to build. I learned a lot building it and still learning as I dig deeper into understanding how everything really works together. Offers some great opportunities to learn how to build, test, diagnose issues in radios - especially if you have test equipment (signal generator, oscilloscope, multimeter). (Don't worry the kit doesn't require you have any test equipment. It has steps for with test equipment or without.) Building each part step by step and testing it was great for learning and increases your chances of a successful build.Some notes:- It has you build a second amplifier in place of the lm386 chip to show details of how the amplifier works. Which is great. Just remember this is to be temporary as it will direct you to replace the chip when done. If you aren't careful you might do what I did and bend all of the pins in the IC 8 pin socket making the secondary amplifier not work and then making it impossible to put the chip back later.- If you have a signal generator it needs to support 455khz, 10.7 MHZ and around 88 MHZ with FM and AM modulation. (This might be a really expensive signal generator to support all of those. Mine didn't it only supported up to 10.7 MHZ and for some reason my FM modulation wasn't work. )- To make it easier to confirm frequency alignment at the end I used a bluetooth connected old car speakerphone that had FM support in it and I made it broadcast my music player from my phone at the specific frequencies needed - that made alignment a lot easier.- Keep an eye on the traces on the board - some of them broke connecting where the component was - Many times just adding more solder could solve it - though in one case I had some spare wire around and just made a jumper to the rest of the trace it broke off from.”
“Still working on the radio, so far only soldered the AM radio side. Works pretty good. The best part of the package is actually the instruction booklet. It gives you troubleshooting tips, tests, and science lessons throughout each step. Some of the tests require an oscilloscope, variable power supply, or signal generator, but the device can be built, tested. and operated without that equipment. Breaks up each section on the board's silkscreen so you know what each circuit is doing. Great lesson in radio receivers and audio amplification. You'll get lots of soldering practice building this. Highly Recommend.”
“This is a great project. Well thought out. The only problem is the volume pot turns on but no adjustment . Am works with earphone. Fm not so good I can hear a faint channel . The fm mixer coil counterclockwise turn doesn't stop. That part I cannot find it?. I ordered another kit hopefully second time is a charm.”