“The elevator installation didn't show which way the elevator horn was to go. but by looking at the installation of the linkages it showed the proper way it should be installed. So you have to look ahead to be able to build the plane correctly. Great plane otherwise. Thank you.”
How would you rate the overall quality of the product?
Very Low
Okay
Very Good
How would you rate the value of the product for the money?
Very Low
Okay
Very Good
How difficult or easy is the product to assemble, use, or operate?
Very Difficult
Average
Very Easy
How well does the product perform / function?
Very Weak
Okay
Very Good
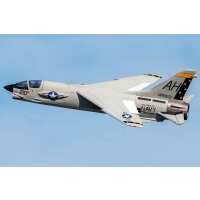
“Flew the Crusader again today. It flies great! I have the rates dialed back on the tailerons and reinforced the bottom of the intake for belly landings.”
How would you rate the overall quality of the product?
Very Low
Okay
Very Good
How would you rate the value of the product for the money?
Very Low
Okay
Very Good
How difficult or easy is the product to assemble, use, or operate?
Very Difficult
Average
Very Easy
How well does the product perform / function?
Very Weak
Okay
Very Good
“I can't believe all you get for $100. The finish on this airplane is great, the servos are good quality, the fan is plenty powerful to fly at half power. Easy to assemble. The first flight was about the easiest maiden I've had with an EDF. 1800mah is the perfect battery size. 1300mah is great but short flights, and 2200mah is a bit too heavy, lands fast.”
How would you rate the overall quality of the product?
Very Low
Okay
Very Good
How would you rate the value of the product for the money?
Very Low
Okay
Very Good
How difficult or easy is the product to assemble, use, or operate?
Very Difficult
Average
Very Easy
How well does the product perform / function?
Very Weak
Okay
Very Good
“I didn't like the combined controls and the original aircraft used a flying stabilator. So I did what all good modelers do. 1. I didn't glue on the horizontal stabs. 2. I locked the elevators at neutral and sliced off the tabs. 3. Glued tabs to fuselage for flush surface. 4. I removed the elevator horns. If you look at the stab parts, there is a lateral hole already present. 5. I matched hole location to fuse, drilled a hole and inserted a plastic bearing. 6. Used an old 0.2" diameter carbon rod and put it through the two bearings. 7. Glued on stabilators. 8. Installed 1 horn on port stabilator just under the pivot point. 9. Cut slot and glued servo to fuse just forward of the cheater hole. (removable with bottom piece) 10. Installed modified rod and clevis. Now the ailerons are separate and the stabilators work on the elevator channel. I may add photos later. Just remember to dial the throws down. Full stabs have much more authority than elevators. BTW, this plane is underpowered with the gear installed. Usually, a small tailwind on takeoff isn't a big deal, but it is for this airplane. Taking off into the wind is a must!”
How would you rate the overall quality of the product?
Very Low
Okay
Very Good
How would you rate the value of the product for the money?
Very Low
Okay
Very Good
How difficult or easy is the product to assemble, use, or operate?
Very Difficult
Average
Very Easy
How well does the product perform / function?
Very Weak
Okay
Very Good
“Please look at previous reviews for more information on throw and CG changes. This video is the maiden flight after the rebuild. Have fun and happy landings https://www.youtube.com/watch?v=Z-BXSq7a1Fk&t=64s”
How would you rate the overall quality of the product?
Very Low
Okay
Very Good
How would you rate the value of the product for the money?
Very Low
Okay
Very Good
How difficult or easy is the product to assemble, use, or operate?
Very Difficult
Average
Very Easy
How well does the product perform / function?
Very Weak
Okay
Very Good
“Picking up from my first review where I had flown vertically into the ground from 20ft from a sever tip stall. The resulting damage was the front end of the F8 (nose cone and canopy retainer ledge) was fully broken off and the first 70mm of the fuselage crumpled. As per my first review I decided to put this to one side for spares but I had around 4 days in the workshop on another project with the F8 staring at me. Slowly I decided that the damage dint look so bad and it was worth having a go at repairing it. First job was to glue back the two halves of the canopy and strengthen with glass tape, one hour saw this completed. Then it was time to get out some of the folds on the fuselage using a hairdryer to heat the effected foam and then manipulate the deformed foam back to shape. This task was done by warming the effected area and then bend the effected area back beyond its original shape allow to cool. After cooling it would form back into either the original shape or back out of shape, in case of the later I repeated the process until it was close to its original shape. Once I was happy with the overall shape and canopy fit I applied a strip of carbon (2mm x 10mm) on either side of the inside of the battery bay to add strength into the now weakened area. The next step was to glue the nose cone back on and strengthen with glass taps. The last job was to fit the canopy, hold the canopy and fuselage sides in alignment using Velcro straps and heat the whole area with the hairdryer allowing it to stand over night. This gave a near perfect fit of canopy to fuselage. Now ready for flying I decided to change the set up on the F8 differently than on the first three disastrous flights. I now set the Ailerons to neutral and had 3mm of up elevator. First flight of the reborn F8 using an Admiral 3s 2200mah Lipo. With adrenalin at maximum and a fellow club member launching full power was applied and the F8 was launched with a brisk throw and the nose up at 30deg. What was all the fuss about no nose drop on launch, she flew straight and level slowly but safely above stall speed until the air bit then wow. Boy does this thing fly well, fast enough for me but if hi speed is your thing then the 4S is a must. Low 80mph passes are awesome but my favourite is 10ft of the floor grooving figure of 8's. ovals and loops out in front. This is the model I hoped for a good performing EDF that can easily be self hand launched and last around 3 1/2 minutes flying time. Changing the ailerons to neutral and adding the extra up amount of up needed, only to the elevators made all the difference. Yes the front end doesn't look pretty but who's going to see that when its flying? Never say die and persevere its suppressing how things turn out. I have now flown the F8 5 times since the crash/repair self launch is no problem flight times are 3 1/2 minutes with 30% remaining in the Lipo. Great fun great value for money”